Do it at Home – Build a LEGO T-Rex
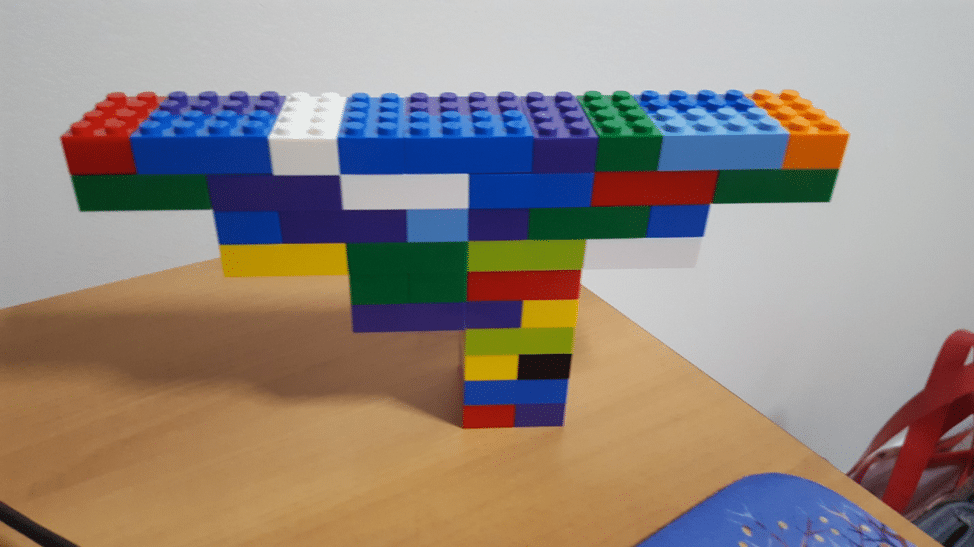
Hi everyone! It’s Mitchell here from the Early Start Discovery Space, and I’m here to teach you how to make a LEGO Tyrannosaurus rex, like the one below, in 6 easy stages.

Me and my dinosaur!
STAGE 1: MAKE A DRAFT
The very first thing I did was make a small, rough model. This is called a ‘draft’. It gives me an idea of how big each part should be so I didn’t end up with a tiny head and huge arms. It also gives me something to refer back to so I can see how I’m doing.

My draft model
STAGE 2: T. REX HEAD
Then I started really building! Usually, I start from the bottom (by which I mean the feet, not under the tail), but because the open roaring mouth of my T. rex was going to be such a feature, I decided to start there instead.
The head of the dinosaur in my draft was two bricks (4 x 2 studs) stacked on top of one another. One is the ‘skull’ and one is the ‘jaw’. Let’s look at the skull first, because I did something really easy to make it bigger: I just made bigger LEGO bricks!
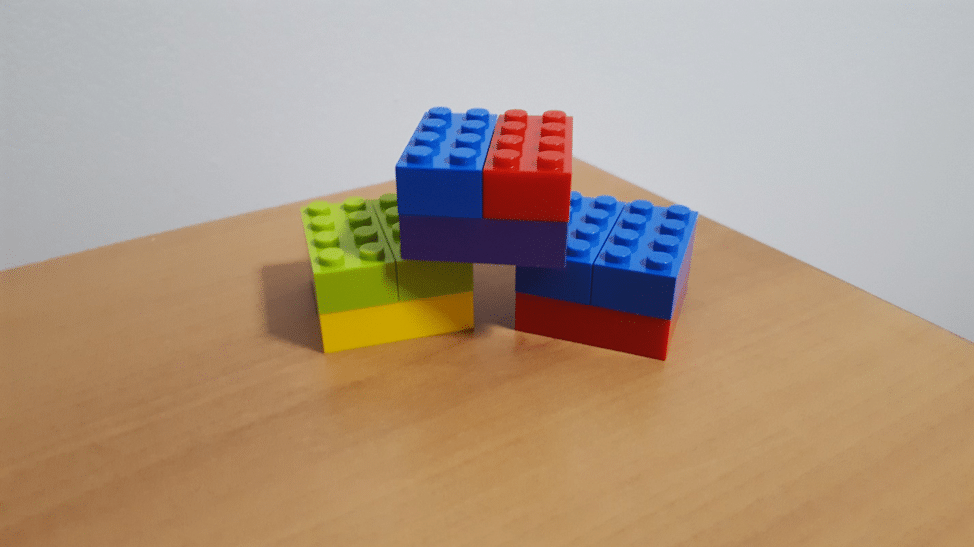
I started with one of those 4×2 bricks, and I wanted it to be twice as long. So I put another one behind it. I didn’t just want it twice as long, though, I also wanted it twice as wide. So I put another two bricks next to the two that were already there. But I didn’t just want it twice as long and twice as wide, I wanted it twice as high. So I put another four bricks on top! We’ll call this a ‘brick block’

Four 4x4 bricks on the bottom and the same on the top (swipe across)

One complete 'brick block' Be sure to overlap your pieces to make your dinosaur stronger
The head of my Tyrannosaurus in my draft was two bricks, so to make the skull and the jaw on my full model, I made two ‘brick blocks’. Now, just stacking them on top of one another doesn’t make for a particularly awe-inspiring sight, so I started to ‘sculpt’ the bricks a bit more. You can see I added another 4×2 brick at the back of the throat to open the mouth up, and replaced the two 4×2 bricks in the chin with 3×2 bricks to make it seem a bit less blocky. I also added some eyes on top, and boom! Dinosaur head! Put this to the side for now.

Add a throat, some eyes and 'sculpt' the jaw.
STAGE 3: THE BODY
For the body we need to make lots of those ‘brick blocks’ we made for the head. There were six bricks in the body of the draft I made at the start, so I’m going to make six more ‘brick blocks’ to build the body, then stack them to make an upside-down triangle.

6 'big blocks' ready to make the body (swipe across)

Body is complete
STAGE 4: THE LEGS
In my draft, my dinosaur is very flat, and its legs sort of seem to start at the base of its belly. I’m going to remodel the bottom of my big T. rex so I’ve got a bit more room to play, and then build some ‘brick blocks’ with the 2×2 bricks to create my model’s legs.

Building our smaller 'brick blocks' (swipe across)
3 'brick blocks' using four 2x2 bricks and two 2x4 bricks (swipe across)

These stack together to create one leg
So this is going pretty well! I still want my dinosaur to have two different legs, though. To stop it from looking too blocky, I’m going to slide each of the small ‘brick blocks’ out away from the body by just one stud each time. Then I’m going to slide one leg forward (by one stud each time), and one leg back, just to give it a little bit of an action pose.
Attach legs to the body (swipe across)

Rearrange your legs to be like steps away from the body (swipe across)

Rearrange your legs again to be like steps forward and back
STAGE 5: THE FEET
The feet are also modified big 4×2 ‘brick blocks’ – take a closer look here. You can see I just have one 4×2 on top holding it all together, and I’ve swung one of the back bricks around into the middle to give it a longer foot.

T. rex foot ready to stomp! (swipe across)

Looking good!
STAGE 6: ARMS & TAIL
After attaching the head and the feet, the only details left are the arms and tail!
For the arms I used a 4×1 on top of a 2×2 – this gives the impression of tiny little arms with adorable hands at the end. For the tail, I used a few of the longest pieces I had and got a little bit thinner as I went along.

Look has his little arms and BIG long tail!
YOU’RE DONE
And now… voila! We’ve done it! We’ve recreated an enormous, really exciting looking Tyrannosaurus rex, and all we had to do was build a simple draft and then double the size.
Feel free to ‘sculpt’ yours a bit more – this one is looking kind of blocky on his legs and belly in particular, so an easy way to make him look even better would be to play around with those areas and see if you can get them to look smoother.
Thanks so much for reading and building along with me, and don’t forget to share all the amazing things you build with us!
See you next time,
Mitchell
Research = Experiences
Play is one of the most powerful ways to learn. That’s why all our experiences are informed by early childhood researchers from UOW.

